Recent Posts

Thursday, July 26, 2012

Fleur de Sel Double Chocolate Cookies

Nothing inspires me to bake more than tasting something amazing baked by someone else.  I'm always thinking (maybe a little egotistically) "I could make this!"  

The first week after moving in together, Jon and I went a little crazy with eating out.  Since the kitchen was half unpacked, there was only water and Diet Coke in the fridge, and it was 104 degrees I was perfectly okay with that.  We tried a few new places and my favorite was Sunflour Baking Company.  It's close by in Elizabeth and I'm already dreaming about being able to stop by on my way to my new school and getting coffee and one of their yummy pastries for breakfast.  

We stopped by for lunch and while ordering my sandwich I was spying all the baked goods out of the corner of my eye.  After finishing up my grilled cheese, I went back up and bought their Fleur de Sel   
cookie.  It was super dark chocolate with the right amount of chocolate chips and sprinkle of Fleur de Sel on top.

I always like a little salt with my sweet.  Once I made a whole batch of chocolate chip cookies and then realized I left out the salt.  I'm sure someone ate those cookies but it wasn't me.  It made such a huge difference.  I've heard people ask before "Why does a dessert recipe need salt in it?"  My answer, simply "Because it does!!!"  It really does make a difference when working with rich ingredients such as chocolate, caramel, etc.  So, the Fleur de Sel or "flower of salt" is just there to bring out the extra oomph of the chocolate.  Don't skip it.  It will change your baking life.  It may be a little hard to find and definitely costs more than your average table or kosher salt but you fall in love with it you'll find more recipes to try it out on.

For my recipe, I used my old standby-Ina Garten's Chocolate White Chocolate Chunk Cookie recipe except, I substituted the white chocolate for bittersweet and semisweet chocolate chips.  They turned out pretty close the the original inspiration.  I was impressed!  I liked that I didn't have to find a whole different recipe from what I already knew worked well.  This bakery will be giving me some ideas from now on.

Fleur de Sel Double Chocolate Cookies-
1/2 pound unsalted butter, at room temperature
1 cup light brown sugar, packed
1 cup granulated sugar
2 teaspoons pure vanilla extract
2 extra-large eggs, at room temperature
2/3 cup good unsweetened cocoa
2 cups flour
1 teaspoon baking soda
1 teaspoon kosher salt
1 cup of bittersweet chocolate chips
1 cup of semisweet chocolate chips ( I used Ghirardelli for both)
Fleur de Sel for sprinkling on top


Preheat the oven to 350 degrees F.
Cream the butter and 2 sugars until light and fluffy in the bowl of an electric mixer fitted with the paddle attachment. Add the vanilla, then the eggs, 1 at a time, and mix well. Add the cocoa and mix again. Sift together the flour, baking soda, and salt and add to the chocolate with the mixer on low speed until just combined. Fold in the chocolate chips.


Drop the dough on a baking sheet lined with parchment paper, using an ice cream scoop or a rounded tablespoon. Dampen your hands and flatten the dough slightly. Sprinkle each cookie with Fleur de Sel.  Bake for exactly 15 minutes (the cookies will seem underdone). Remove from the oven and let cool slightly on the pan, then transfer to a wire rack to cool completely.

Wednesday, July 20, 2011

Friendly Rose Cake

Yellow roses are suppose to represent friendship and I believe this cake is very friendly.

I mean, who would not want to be friends with a chocolate cake with light yellow buttercream? The chocolate cake was one of my favorites-One Bowl Chocolate Cake. I'm not sure why it's called "one bowl" because you really use 2 but I don't question Martha's methods. I modified my favorite buttercream recipe and it is now my FAVORITE favorite buttercream recipe.
Basically it was this:

4 sticks of unsalted butter, softened
8 cups of confectioner's sugar
6 tablespoons of heavy cream
4 teaspoons vanilla (I used clear for this recipe)

Blend the butter until smooth and add one cup of confectioner's sugar at a time. Add heavy cream and vanilla and blend until smooth.


Of course these "rose" cakes have been all over the baking blogs lately but I hadn't seen one quite like this. Most were one color and I thought it would look lovely to do a variation of the same shade. Yellow and chocolate seemed to be a good combination and I'm glad I chose it instead of something more predictable (ahem, pink). Only having one 1M tip made it a little difficult since I couldn't alternate the colors and had to do one at a time. I went back and filled in what I could with the tip and added a few more roses to hide some holes. This is my new favorite tip and I'm excited to use it next time I make cupcakes. Chocolate cupcakes with yellow roses would be lovely too!

Saturday, July 9, 2011

Brownies and Baking Confessions


I have a secret baking confession. Despite being very OCD about using the best vanilla, whole milk, and good cocoa I always make brownies from a box. Well, always until this week.

I could have possibly gone the rest of my life baking brownies from a box, (preferably Betty Crocker Supreme Brownies with the Hersey's Syrup) if it hadn't been for Jon buying me Baked Explorations: Classic American Desserts Reinvented for Christmas. These guys were slightly on my baking radar but I hadn't tried any of their recipes until we made their Chocolate Whoopie Pies (which I forgot to photo and blog). Now their Swiss Meringue Buttercream is my go to frosting of choice. When I saw their brownie recipe from their first cookbook I knew I had to change my ways. The chocolate to butter to vanilla to dark cocoa ratio was unbelievable so I knew it had to work. And work it did, the chocolate flavor that you will experience is better than any brownie/cake experience I've had. They are perfectly fudgy and have that thinner than paper crust on top. What is it about that little crust that is so great?


The modifications I made on this recipe was this: it called for 11 ounces of dark chocolate. Dark chocolate means 60-85% cacao. For me I thought it would be much easier on me (and my wallet) to buy one 11.5 ounce bag of bittersweet (60%) chocolate chips. I bought Ghirardelli since that is the best brand I can find in Salisbury and they are better than most. And that extra half ounce? An extra half ounce of chocolate never hurt anyone! For the dark cocoa I used Hershey's Special Dark that I already had on hand. Oh, and that little tip about buttering your pan, then lining it with parchment paper? Best trick ever.

I'm completely won over. Goodbye little packets of syrup. And in case you still aren't convinced to make these brownies, they are on Oprah's List of Favorite Things. Isn't that enough?

The Baked Brownie - Adapted from Baked: New Frontiers in Baking

1¼ cups all-purpose flour

1 teaspoon salt

2 tablespoons dark unsweetened cocoa powder

11.5 ounces (1 bag) dark chocolate chips

1 cup (8 ounces) unsalted butter, cut into 1-inch pieces

1 teaspoon instant espresso powder

1½ cups granulated sugar

½ cup packed light brown sugar

5 eggs, at room temperature

2 teaspoons vanilla extract

1. Preheat the oven to 350 degrees F. Butter the sides and bottom of a 9×13-inch glass. Line the pan with parchment paper.

2. In a medium bowl, whisk the flour, salt, and cocoa powder together.

3. Put the chocolate, butter and instant espresso powder in a large bowl and set it over a saucepan of simmering water, stirring occasionally, until the chocolate and butter are completely melted and smooth. Turn off the heat, but keep the bowl over the water and add the sugars. Whisk until completely combined, then remove the bowl from the pan. Cool until room temperature.

4. Add 3 eggs to the chocolate mixture and whisk until combined. Add the remaining eggs and whisk until combined. Add the vanilla and stir until combined. Do not overbeat the batter at this stage or your brownies will be cakey.

5. Sprinkle the flour mixture over the chocolate mixture. Using a rubber spatula (not a whisk), fold the flour mixture into the chocolate until just a bit of the flour mixture is visible.

6. Pour the batter into the prepared pan and smooth the top. Bake in the center of the oven for 30 minutes, rotating the pan halfway through the baking time, until a toothpick inserted into the center of the brownies comes out with a few moist crumbs sticking to it. Let the brownies cool completely, then lift them out of the pan using the parchment paper. Cut into squares and serve.

7. Store at room temperature in an airtight container or wrap with plastic wrap for up to 3 days.


Baking Lust: Fresh Florals

I've been saving these up for a while now on Pinterest. I know edible flowers are impressive but they still don't beat the real thing in my book.


This cake is pretty much perfection. And the glass cup holding the flowers?! Great idea.


Buttercream and Baby's Breath.


Love this one!


Another pretty purple arrangement.


Love this small cake surrounded by flowers on the glass cake plate.


So rustic and pretty!

Source: weddingchicks.com via


Chocolate ganache with peach flowers makes a lovely combination too.


Love the yellow with the bright pink and orange flowers.


Monday, June 20, 2011

Summertime

Thank goodness for summer because my baking time was really being compromised this school year! I'm trying to come up with a list of all I want to bake/accomplish this summer. For now this is all I've done:

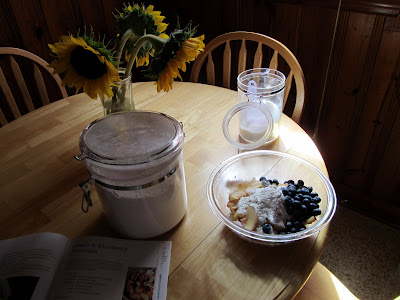
Peach & Blueberry Crumbles for Father's Day- except I made one big crumble instead of individual ones. Still just as delicious. I could eat up that crumble part forever.


I'm attempting at least one big baking idea each week. I have a lot of ideas saved up that I have not had time to attempt for no real reason other than practice. This week my goal is a cake with fresh flowers. I'm a little obsessed.

Oh, and I want to go to Paris.

Tuesday, May 24, 2011

Nutella Chocolate Chip Cookies


Everytime I see a recipe including Nutella I save it. Who knows how many Nutella recipes I have stashed away somewhere on my computer (mostly starred from various blogs). However, after seeing this one yesterday afternoon I knew I had to make this cookie ASAP.

I have to say, this is probably the best cookie recipe find ever. On it's own it would make a great chocolate chip cookie. Then add in the Nutella and it's perfection. Thin and crisp but chewy on the inside- that's how I like my chocolate chip and this fits the description. Super easy to make. I pretty much did the entire recipe during commercial breaks of the Real Housewives of New Jersey. I know, I know, Nutella is from Italy so it's a great connection. I was thinking the same thing!

**The super cute paper doily was purchased at Bake it Pretty in Asheville, NC.

Nutella Chocolate Chip Cookies

1/2 cup (1 stick) unsalted butter, at room temperature
1/2 cup granulated sugar
1/2 cup packed light brown sugar
1/2 cup Nutella (I maybe threw in an extra tablespoon or two...)
1 egg
1/2 teaspoon vanilla extract
1 1/2 cups all-purpose flour
1 teaspoon baking soda
1/4 teaspoon salt
3/4 cup semi-sweet chocolate chips

Preheat oven to 350 F. Line two baking sheets with parchment.

Whisk the flour, baking soda and salt together in a small bowl.

In the bowl of a stand mixer fitted with the paddle attachment, beat the butter on medium speed until smooth and creamy, about 1 minute. Add both sugars and cream on medium speed until light and fluffy, about 3-4 minutes. Scrape down the sides of the bowl. With the mixer on low speed, add the egg and vanilla and beat to combine. Mix in the Nutella until the dough is smooth.

With the mixer on low speed, add the dry ingredients to the mixer a little at a time. Beat just until incorporated. Scrape down the sides of the bowl then add the chocolate chips. Beat briefly just to distribute the chips. (I refrigerated the dough for about an hour here, but it's not necessary.)

Use a small cookie scoop to portion the dough on the prepared baking sheets, leaving about 2 inches between them. Bake for 7-8 minutes, or until the edges of the cookies are set (the tops may still be soft). Transfer baking sheet to a wire rack and let the cookies cool for about 5 minutes before transferring them to the racks to cool completely.

Makes 24 cookies.

Tuesday, April 26, 2011

Key Lime Pound Cake


I was so excited to try it this morning when I woke up that I couldn't even wait til after I went running or to take a photo.

Spring break has finally arrived and I promised myself that with spring break would come more baking. It's not that I haven't baked anything since my last actual baking post (was that the Caramel Cake in January?!) but just not managed to put baking+photos+blog post all together.

When I first saw this cake in Southern Living magazine I knew I had to bake it. Key Lime Pie, well let me rephrase that, Good Key Lime Pie is one of my favorites and you know Southerners love their pound cake so it was a win-win scenario. It's very springtime. The cake has just a hint of lime and the glaze is very tangy. The best part: not dry at all! I hate a dry pound cake.

The cake is easy to make, that is if you like juicing key limes. It's been a while since I've made a Key Lime Pie so I had totally forgotten how annoying that is. After about the 15th lime and maybe 1/8 cup of juice (half of the total) I tried to imagine I was a giant and was juicing regular size limes with my giant hands. That really didn't make it any more fun. Then I was overly anxious to see how much juice I had so I poured it in my 1/4 measuring cup. Halfway there. So I kept on juicing. A few limes later I was overly excited again so I picked up the halfway full measuring cup of lime juice. I hit it on something sitting nearby and juice spilled everywhere. Ahhhh! A few expletives and dozen key limes later I had enough and thus ended my juicing. Well, until I had to make the glaze...

Key Lime Pound Cake

Ingredients:
  • 1 cup butter, softened
  • 1/2 cup shortening
  • 3 cups sugar
  • 6 large eggs
  • 3 cups all-purpose flour
  • 1/2 teaspoon baking powder
  • 1/8 teaspoon salt
  • 1 cup milk
  • 1 teaspoon vanilla extract
  • 1 teaspoon lime zest
  • 1/4 cup fresh Key lime juice

Glaze:
  • 1 cup powdered sugar
  • 2 tablespoons fresh Key lime juice
  • 1/2 teaspoon vanilla extract
Directions:
  • 1. Preheat oven to 325°. Beat butter and shortening at medium speed with a heavy-duty electric stand mixer until creamy. Gradually add sugar, beating at medium speed until light and fluffy. Add eggs, 1 at a time, beating just until blended after each addition.
  • 2. Stir together flour, baking powder, and salt. Add to butter mixture alternately with milk, beginning and ending with flour mixture. Beat at low speed just until blended after each addition. Stir in vanilla, lime zest, and lime juice. Pour batter into a greased and floured 10-inch (12-cup) tube pan.
  • 3. Bake at 325° for 1 hour and 15 minutes to 1 hour and 20 minutes or until a long wooden pick inserted in center comes out clean. Cool in pan on a wire rack 10 to 15 minutes; remove from pan to wire rack.
  • 4. Prepare Key Lime Glaze, and immediately brush over top and sides of cake. Cool completely (about 1 hour).

Tuesday, March 29, 2011

Cake and Dress: Hydrangea

Sunday, March 20, 2011

Bake Lust: Perfect Match

Friday, February 25, 2011

DIY Cadbury Eggs

Yes, please!

022511-cadbury.jpg
spotted at the kitchn

Monday, January 31, 2011

Banana Pudding Cake


Years ago, probably in high school, I made banana pudding for my dad. It was a baked banana pudding which is apparently the proper way to make it. Well, don't tell that to my dad. He straight up told me he preferred my grandmother's instant vanilla pudding, cool whip, refrigerator version. Not sure if I've ever made baked banana pudding since then! I learned my lesson. When it comes to something my grandmother makes and my dad likes, don't mess with it.

So it makes no sense that when my grandmother called me on Saturday to see if I was going to make my dad a birthday cake I decided to make him a banana pudding...cake.

I've never made a banana cake and even though I love bananas, I've never loved banana bread/baked things. This cake changed my mind though. Very good. Very. Very. The vanilla wafer toffee was made but I didn't like the look of it so much (although it tasted yummy) so I just used vanilla wafer crumbs. Oh, and the vanilla whipped cream? What isn't there to love about that?


Banana Pudding Cake
from Sugar Plum~Makes 10 servings
1 1/2 cups all purpose flour
1 tablespoon cornstarch
1 teaspoon baking powder
1 teaspoon baking soda
1/4 teaspoon salt
1/4 cup unsalted butter, softened
1/4 cup oil
3/4 cup granulated sugar
2 large bananas, mashed
1/2 teaspoon vanilla extract
4 large egg yolks
3/4 cup buttermilk

Vanilla Wafer Toffee
2 tablespoons unsalted butter
1/4 cup packed brown sugar
3 tablespoons heavy whipping cream
1/8 teaspoon salt
1 1/3 cups coarsely chopped chopped vanilla wafer cookies

Vanilla Whipped Cream
1 cup heavy whipping cream
3 tablespoons granulated sugar
1/2 teaspoon vanilla extract

Heat oven to 350 degrees F. Butter and flour bottom and sides of a 10-inch springform pan.

In a medium mixing bowl, sift together flour, cornstarch, baking powder, baking soda and salt. In a large mixing bowl, using a mixer on medium speed, beat together butter, oil, sugar and banana until creamy - about 1-2 minutes. Beat in egg yolks and vanilla until combined - about 1 minute. Reduce mixer speed to low and gradually beat in flour mixture, alternating with buttermilk, until combined.

Place batter in pan; bake 30 minutes or until well risen and golden brown. Cool completely on a wire rack.

To make the Vanilla Wafer Toffee, melt butter in a medium saucepan over medium heat; whisk in brown sugar, cream and salt and bring to a boil, whisking frequently. Keep whisking and cooking for a minute or two, until sugar is dissolved. Remove pan from heat and stir in vanilla wafers until well coated. Scatter wafer pieces over a greased cookie sheet. Bake 8 minutes or until golden brown and bubbly. Cool on waxed paper, breaking toffee into smaller pieces.

To make the Vanilla Whipped Cream, beat cream, sugar and vanilla together in a large mixing bowl, using a mixer on high speed, until stiff peaks form.

To assemble the cake, first remove sides from springform pan. Pipe or spread whipped cream over cake. Sprinkle vanilla wafer toffee on top of cake.


Sunday, January 23, 2011

Baking Lust: Bake + Vintage


My dream come true: Open a bake/vintage shop.

This one is cute. Red Velvet Art. Before and after seen on Design*Sponge.


Black and White Krispie Treats


I love homemade rice krispie treat. Maybe one day rice krispie treats will be the new hip baked good, like cupcakes, macarons, and whoopie pies have been the last few years. Except that it isn't reallly baked, but you know what I mean.

Earlier this week I saw a recipe for Hot Chocolate Rice Krispie Treats. I was immediately sold but when I got to the grocery store I just couldn't commit to cocoa krispies. It took me back to 3rd grade when my grandmother had 18 types of cereal and we ate a different one each day. Anybody remember Reeses Peanut Butter Cup cereal? I swear it looked like dog food but I still ate it. And Trix? I always felt bad for the rabbit and how they never gave him any cereal so I boycotted it. Really, I just didn't like it, but that was another good reason. I couldn't see me eating a bowl of cocoa krispies and instead just bought the regular kind. Actually the store brand, because I was feeling cheap that day.

So once I got around to making them I had to figure out another way to make them chocolate since I also felt too cheap for hot chocolate mix. If I drink hot chocolate I like the real thing. I hate how hot chocolate mix never dissolves all the way. So basically, I scrapped the whole recipe.

Here is what I did:
Black and White Krispie Treats
1/4 cup of butter (half a stick)
1 bag of marshmallows (plus 1/2 bag for later)
4 oz. good semisweet chocolate (1 bar)
6 cups rice krispies

Spray baking pan with cooking spray. Chop 1/2 of chocolate bar and melt with butter in a large saucepan over low heat. When chocolate and butter are melted add 1 bag of mini marshmallows. Continue to stir until marshmallows are melted and incorporated with chocolate.
Remove from heat and add 6 cups of rice krispies. Now add 2 cups of mini marshmallows. Stir in until slightly melted. Pour into prepared pan and press down. Immediately spread 2 cups of marshmallows on top of krispies and press down. Let cool.
Melt remaining 1/2 bar (2 oz.) of chocolate over a double boiler until melted. With a spatula drizzle over krispies and marshmallows. Let cool and cut into squares.

Monday, January 10, 2011

Caramel Cake: Revisited 1 Year Later

Friday, on the way home, I had a baking craving. I love baking cravings. I had no idea what I was going to bake but I was going to bake something. Somehow caramel cake popped up into my head. I thought of my first and last caramel cake attempt. It was a good cake but thinking back on it it was a little cakey. I should have split those 3 layers into 6 and upped the caramel to cake ratio.

Here is the sappy, sticky, sweet part:
Last year when I made the cake it was a random baking event and ended up taking it to a small engagement party for two friends who had just recently gotten engaged. I'm thinking about all of this driving home and I remembered a conversation I had that night with newly engaged Heather about how I had a date the next night with an art director in Charlotte. That's what I called him I think. Our first date was January 10th. So, I'm making caramel cake the same weekend as I did last year. The first weekend in January. The weekend of my first date with Jon. That is why I had caramel cake on the brain (or heart).

Here is the recipe I had saved and forgotten about. It was okay. Didn't quite live up to my expectations. The cake was ever so slightly dry and the caramel was good but maybe because I forgot to add the vanilla at the end it wasn't as good as it could have been. Oh, and the presentation...I had to tell Jon it was supposed to look like that! Jon and I took it to poker night and when he told the sad story of how I didn't make him a birthday cake we turned this into a 5 month late celebration. I told him to look sad in the photo.

Sunday, November 14, 2010

Baking Lust-Art 101

Autumn Rhythm Number 30 by Jackson Pollock

Sunflowers by Vincent Van Gogh


Cakes by Wayne Thiebaud

Flowers in a Glass Vase by Rachel Ruysch

Homage to the Square Series by Josef Albers

l'obsession

Thursday, November 11, 2010

Kitchen Drawers

Most days off I've had lately have been teacher workdays and even on the weekends I'm somewhere else. So today means I need to do all the things I haven't, starting withk reorganizing my kitchen. Not sure it will be as good as Martha's but I can try.

Thursday, October 28, 2010

Pumpkin Whoopie Pies

So, let me explain. My camera hates me. At the beginning of August Jon and I went to Nashville. I took lots of photos, most importantly of Jon beside Gram Parson's suit at the Country Music Hall of Fame on his birthday and of a room full of vintage party dresses. Then I got home and my computer and camera refused to get along anymore. It'd really been an on and off relationship for some time. So everything I've baked since then has not been blogged about because I feel like if I don't have a picture it didn't really happen. But some things need to be shared.

I've been on a whoopie pie kick lately. I guess they are like the new cupcake. or macaron. or whatever. I've made a few varieties but this is the best one so far. I took them to school for a halloween dessert fest. There were lots of store bought things and some regular brownies and such. When I went to get my dish, everything else had leftovers and these were gone! Unlike some other whoopie pies I've tried these are very moist (ugh, I hate that word because everyone else hates that word but can't think of another to use) and have the perfect amount of pumpkin and spice. A must have for Halloween and the upcoming month of November.

*And if you really want a picture click on Tracy's link. They looked the same :)

Pumpkin Whoopie Pies

Cookies

3 cups all-purpose flour
2 tablespoons cinnamon
1 teaspoon baking powder
1 teaspoon baking soda
1 teaspoon salt
1 teaspoon ground ginger
1/2 teaspoon ground nutmeg
1 cup granulated sugar
1 cup packed light brown sugar
1 cup canola oil
3 cups canned pumpkin
2 eggs
1 teaspoon vanilla extract

Cream Cheese Filling
3 cups confectioners' sugar, sifted
8 ounces cream cheese, at room temperature
4 ounces (1 stick) unsalted butter, at room temperature
1 teaspoon vanilla extract

Preheat oven to 350 F. Line two baking sheets with parchment paper.

In a large bowl, whisk together the flour, cinnamon, baking powder, baking soda, salt, ginger and nutmeg. In another bowl, whisk the sugars and oil together. Add the pumpkin puree and whisk to combine thoroughly. Add the eggs and vanilla and whisk until combined. Finally, gradually add the flour mixture to the pumpkin mixture and whisk to combine completely.

Use a small scoop (or a large spoon) to drop rounds of dough (about 1.5-2 tablespoons each) onto the prepared baking sheets, spacing them about 1 inch apart. Bake for 10 to 12 minutes, or until a toothpick inserted into the center of a cookie comes out clean. Remove from the oven, then let the cookies cool for a few minutes on the baking sheets before removing them to a wire rack to cool completely. Repeat with remaining dough.

To make the filling, beat the butter on medium speed in the bowl of a stand mixer fitted with the paddle attachment until smooth. Add the cream cheese and beat to combine. Add the confectioners' sugar and vanilla and beat until smooth.

To assemble the whoopie pies: Turn half of the cookies over so the flat side is up. Put the cream cheese filling in a disposable pastry bag and cut a hole from the end. Pipe the filling onto the flat side of the turned cookies. Sandwich with the remaining cookies, pressing down slightly so the filling spreads to the edge. Cover the whoopie pies and transfer them to the refrigerator for at least 30 minutes before serving.

Thursday, October 14, 2010

Bake Lust: Children's Lit


I'm using this to explain my lack of baking lately. Well, it's not my only excuse but it's the easiest to blame. Here are some really lovely cakes inspired by good children's lit. Of course I chose these cakes based on my favorite books:

Let's start with a basic intro into children's lit. Mostly early elementary but very good choices.

And also, the basic intro into children's lit:

The Very Hungry Caterpillar by Eric Carle- I used to check this book out from the library every time my grandmother took me. Love, love, his illustrations. The cake above is maybe perhaps the best cake ever.

When I was in 3rd grade we read Farmer Boy as a class. My mom bought me the Laura Ingalls Wilder box set and I would do nothing but read book after book each weekend. Last year I read several of them to my 3rd graders and I was happy to see that even in these technological times, the kids still loved hearing about Laura and Mary's adventures, Pa's fiddle, and traveling in covered wagons. I also think about Little House on the Prairie everytime I hear the word calico.

And my all time favorite...love, love, love. Love.
The Giving Tree.


Love.